Jump to Section
Why Disable ReSharper?
ReSharper is a powerful tool, but it can slow down Visual Studio, especially in large projects.
Temporarily disabling it can free up system resources and improve performance.
Let’s explore how to do this.
📽️ Watch the Tutorial on YouTube with Detailed Steps
📽️ Video URL: https://www.youtube.com/embed/nNZx_2RJAvk
Steps to Disable ReSharper in Visual Studio
Follow these simple steps to suspend ReSharper in Visual Studio temporarily:
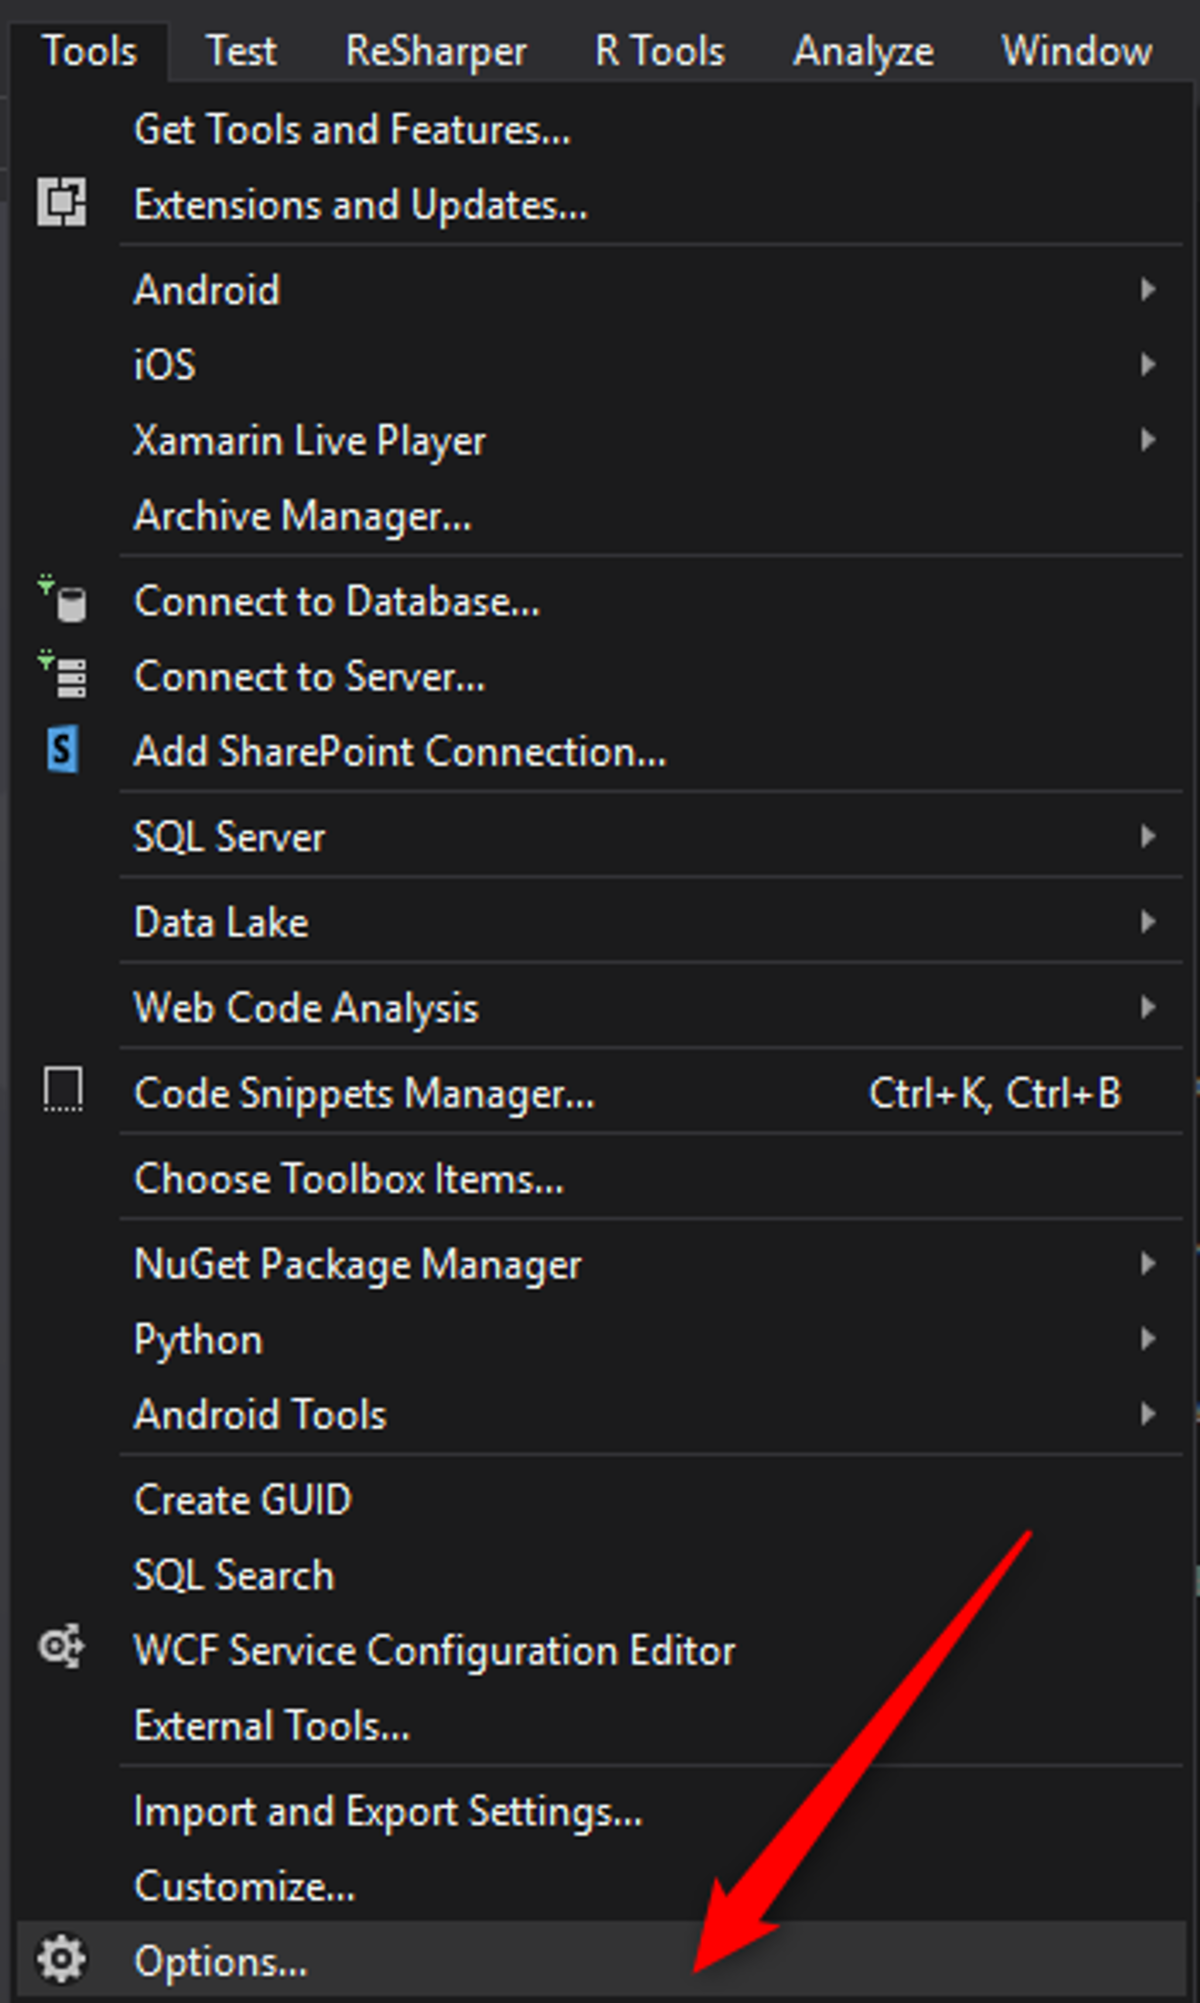
1. Open the Tools Menu
At the top of Visual Studio, click on Tools.
2. Go to Options
In the dropdown, select Options. A new window will open.
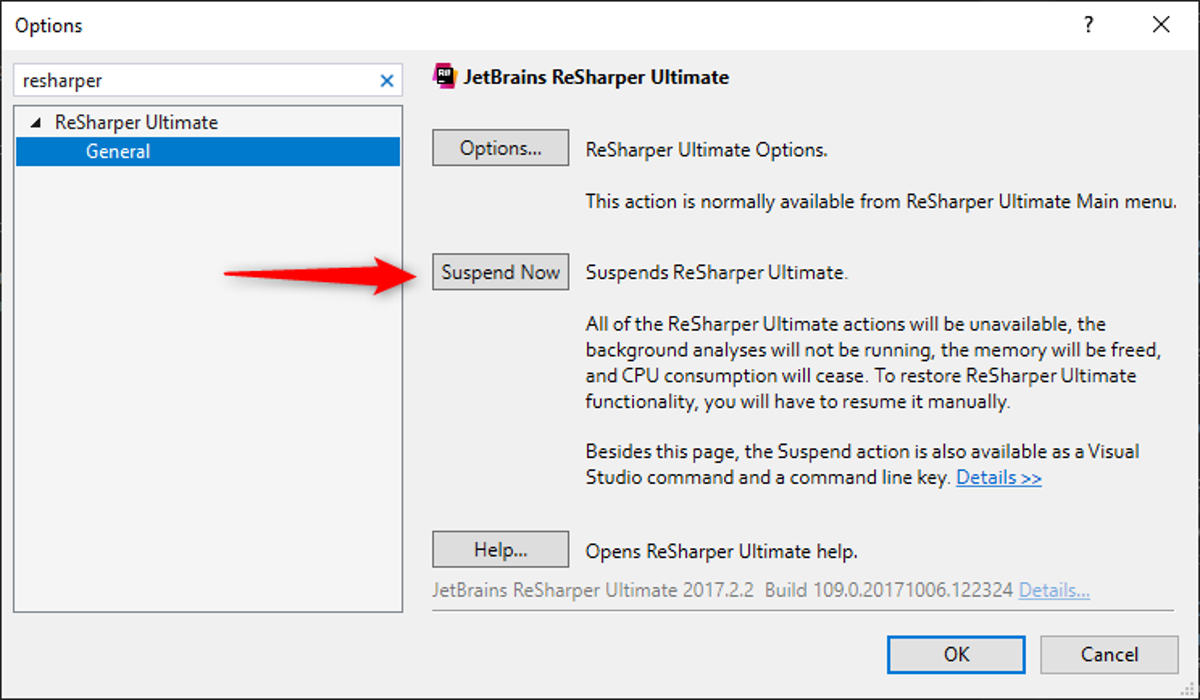
3. Locate ReSharper Settings
Use the search bar at the top of the Options window to find "ReSharper".
Click on ReSharper > General.
4. Suspend ReSharper
In the General settings, click the Suspend Now button.
5. Confirm Your Changes
Hit OK to save your changes and disable ReSharper.
Quick Visual Summary:
Menu Path: Visual Studio > Tools > Options > ReSharper > Suspend Now.

Visual Studio > Tools > Options

Visual Studio > Tools > Options > ReSharper Suspend Now button
How to Re-Enable ReSharper
Turning ReSharper back on is just as easy:
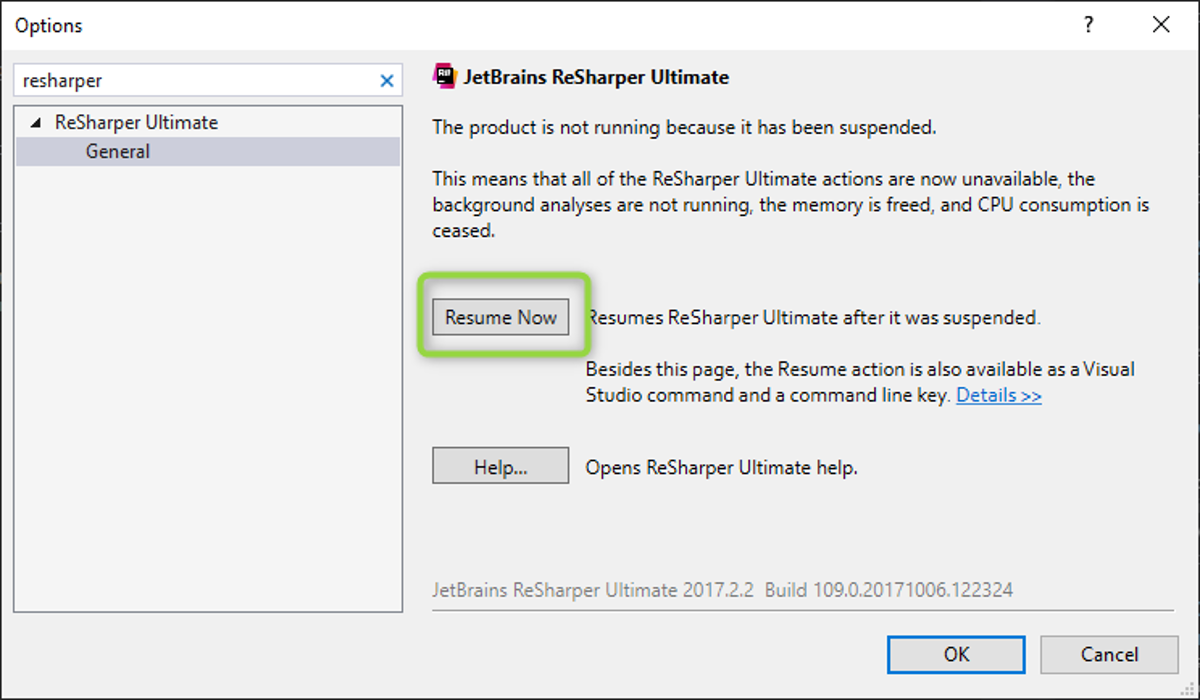
- Return to the ReSharper General settings in the Tools > Options menu.
- Click the Resume Now button.
- Confirm with OK.

Visual Studio > Tools > Options > ReSharper Resume button
Final Thoughts
Knowing how to suspend and resume JetBrains ReSharper is a practical skill.
Especially when you are working with a huge solution or many open IDEs at once.
It allows you to:
- Optimize Visual Studio’s performance.
- Balance resource usage while retaining access to powerful tools.
Check out our blog for more practical tips and articles about .NET development.

